Tips on How to Make Plasterboard on the Ceiling in Your Home
Making Plaster on the Ceiling - This specific step-by-step guide on precisely how to plasterboard a threshold will help any DIYer, including a gallery involving how-to images, material and even tool lists and skilled advice.
Plasterboarding a roof is a satisfying when slightly awkward DIYjob of which can save a good fortune on labour costs. Get out how to determine, where to start and even exactly what tools in addition to materials are essential with our own easy step-by-step guide upon how to plasterboard some sort of ceiling.
How to Plasterboard an Existing Threshold
This is possible to resolve plasterboard over an present ceiling, but you will need to figure out where the joists usually are first. For upstairs bedrooms this can be performed by measuring the joist gaps in the loft space.
Downstairs you'll have in order to prod the ceiling together with an awl or raise the floorboards within the particular room above. Mark the particular joist gaps on typically the wall with chalk in addition to you're all set to go. The various other option is to tape off the existing roof to expose the joists -- this would be the particular preferred option mainly because it likewise results in less build-up.
How to Plasterboard a new New Threshold
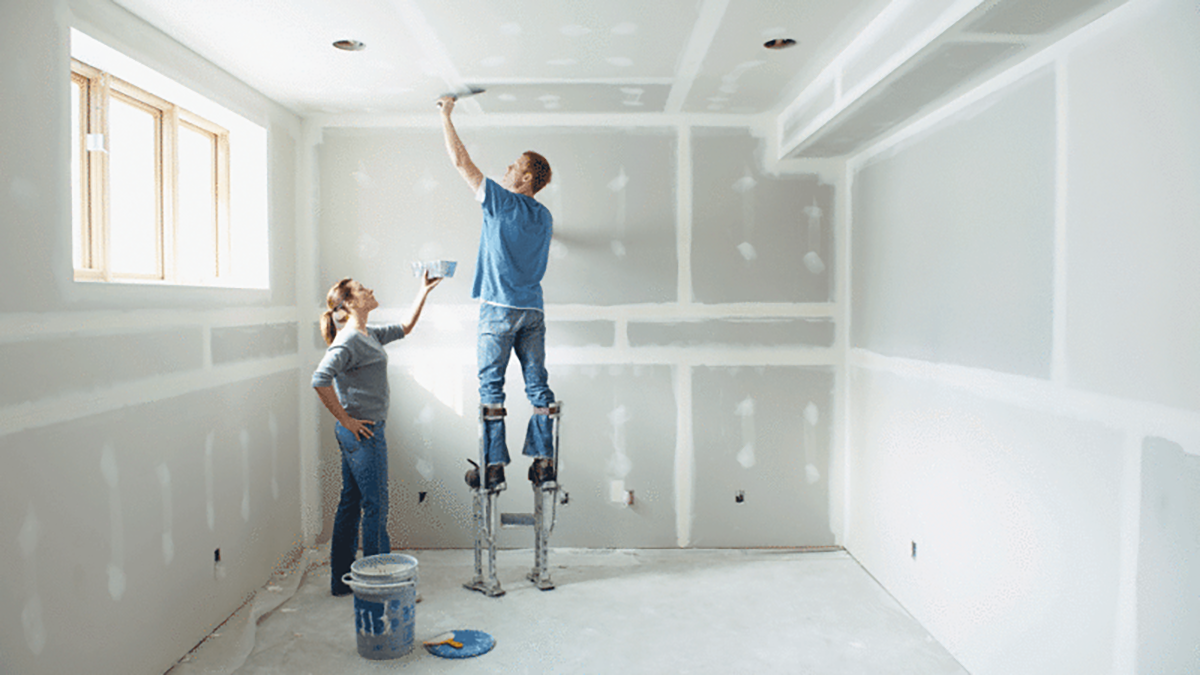
Plasterboarding the new ceiling is significantly much easier with two people, someone to support the plasterboard and something to screw into spot, but it can end up being done by one individual using the help of several lengths of wood.
- 50mm x 50mm sawn wooden for noggings
- Lengths involving wood to assist support plasterboard
- 12. 5mm plasterboard (tapered edge)
- 38mm drywall anchoring screws
- Perforated plasterboard tape
- Joints filler
- Sand paper (120 grade)
- Recording measure
- Rubber-bladed filler applicator device or plastering trowel
- Trestles and planks or alumunium platform to stand upon
- Dust cover up
- Goggles
- Cutlery (Stanley, preferably)
- Electric electric screwdriver
- Spirit degree
- Pencil
- Wooden saw
For non-sloping ceiling you can get a new pretty accurate area description of the ceiling by simply measuring the floor. Increase the width of the particular room by its size (in metres) and this kind of will give you a new square metre figure. Plasterboard is commonly found in two. 4 x one 2m (2. 8m? ), a single. 8 x one 2m (2. 1m? ) in addition to 1. 2 x. 9m (1. 08m? ) shapes at most builders retailers and DIY stores.
In order to cut the boards, gauge and mark the table carefully. Lay a heart level over the line in addition to use a sharp Stanley-type knife to cut throughout the paper. Bend the plank the opposite way in order to the cut and after that cut through the document on the other part of the board. You need to now have an extremely neat cut board.
Beginning from the corner regarding the area, position the 1st board. The final of typically the plasterboard sits half approach across the joist allowing the next board in order to butt up to that.
Plasterboard has to be well reinforced but if you cannot find any real wood between the joists in which they meet the wall membrane, nail in some noggings made up of 50mm x 50mm wood. Its also wise to nail in noggings between your joists where the extended edges of the plasterboard will fall.
Use 38mm plasterboard screws to repair the board for the joists and noggings. Screws will be a better bet compared to nails for renovation assignments, where hammering can probably disturb or damage the particular joists. Fixings should end up being made every 150mm. Maintain fixings a minimum of 13mm apart from board edges of which have been cut; 10mm from factory-bound edges.
End up being careful not to travel the screws in as well deep or you'll harm the board. Once typically the screw head dips merely below the face area of the particular board, stop tightening.
Surprising the boards produces some sort of stronger ceiling and inhibits any cracks which may create in the filler by running the full size or length of the particular room. Leave a 3mm gap between boards: this kind of helps the filler to obtain a good grip.
Once each of the boards are in location, tape over them using perforated plasterboard tape. Mixture up the joint for filler injections so that it helps make a smooth, but quite stiff paste. This for filler injections is mixed by serving a measured amount involving water into a container and then adding the particular filler in powder contact form. Stick to the instructions or you will end up having more filler compared to you're ever likely in order to use.
Make use of a rubber-bladed applicator device or a traditional metallic plastering trowel to complete in between the bones and screw head scoops. This wide-bladed applicator allows to feather out typically the filler so that there is certainly only a tiny shape to get rubbed down whenever its dry.
Once might finished filling, leave typically the ceiling to be dried up for 24 hours prior to lightly sanding down using 120-grit paper. The for filler injections creates a very good dust that is specifically unpleasant to be bathed in, so open almost all windows and put upon goggles, gloves and some sort of good dust mask ahead of you start this career.
Article Source : https://www.homebuilding.co.uk/advice/how-to-plasterboard-a-ceiling
